CraftArtEdu Blog
-
Gwenn Seemel's advice
 [email protected] on Apr 02, 2013
Tagged in: UntaggedToday's blog is about copying, copyright and artist Gween Seemel's six easy steps to make sure her art doesn't get ripped off on the internet.
Where would we be without our computer and the net? Images, ideas fly around the globe at the speed of light it seems. There are unintended consequences and easy copying is one of them.
So, here's a link to blog "Face Making" and Gwenn's advice.
Gwenn Seemel's "Face Making" blog
Have a great day!
-
What do you see?
[email protected] on Mar 21, 2013
Tagged in: Untagged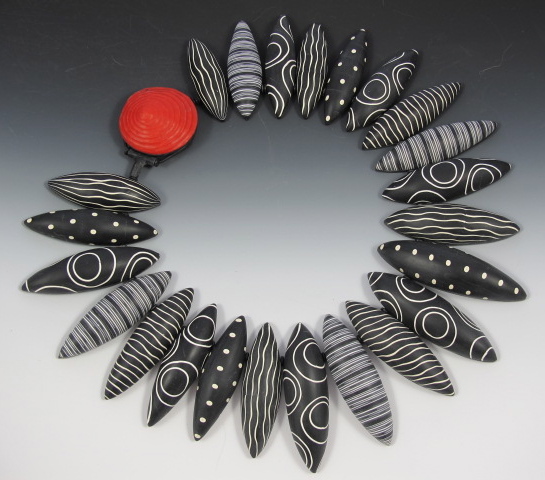
After making the mudcloth discs and the hemispheres, I launched into simpler canes worked in black and cream. These were inspired by a fabric swatch I saw on Pinterest and I'd been wanting to make a cane of offset circles for some time - that one was stewing in my brain.
Once the canes were made, then it was what do I do with them?
I'm partial to pod shapes, thick in the middle, taper to the ends so I just started making pods with my new canes.
Now, I'm not ordinarily a necklace making person, I just veer off to pins and pendants. Maybe it's my short attention span but this time, I made so many, well, it seemed time to use them in a larger piece.
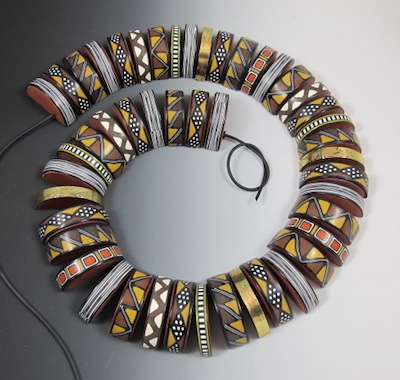
I arranged them in what I thought was a pleasing, harmonious arrangement. To save time later, I shot a picture of the arrangement with my iphone. And...the strangest thing happened, the predominantly cream pods jumped out at me and were pretty much all I saw. It took a photo for me to see it. I removed them, replaced them with predominantly black pods and the harmony was restored.
Maybe it's the reduction in size, maybe that's how I was able to see the piece in its entirety.
So, todays tip is this - when you're making a large piece, shoot a picture of it, you may see something you did not before.
-
Thank you, Mom
[email protected] on Mar 15, 2013
Tagged in: Untagged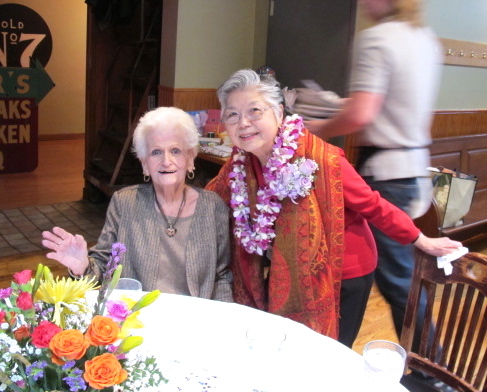
Of all the people I know or have known, it's my mom who is most responsible for my being where I am, for what I do and for who I am. I'm sure a good many creative people would say the very same thing for who first introduces us to creative endeavors and the joy of creating something from raw materials?
She taught me how to knit and crochet and embroider when I was about 8. Whatever I made, she praised and appreciated. The seed was planted. I was good at what I did, according to mom. I could create and I did not always have to rely on buying to get something.
She taught me to believe that shared glory was better than individual and that helping others was better than helping myself. For, one cannot be envious if one revels in the accomplishments of others, every day is a good day and the dark shadow of envy rarely crowds out happiness.
When I found polymer clay, she was worried. She confided in Vernon..."Vernon, I'm worried, Donna wants to make her living with clay"..."I know, I'm worried, too" was his reply. But, to both of their credit, they didn't tell me, I found out years later so both of them held their tongues and let me try. If they had, I'd not be doing what I do, I had and have too much respect for their opinions.
Today, is my mother's birthday. She used to say it was old income tax day, and she rarely got anything on her special day. Her wants were so small, all she wanted was a doll with real hair, not the hard plastic heads on the cheap dolls of the day. She never got that doll but she made sure we did.
She taught us sacrifice, love, support, encouragement, honesty and a vision of the world outside ourselves. The world is larger than the 3 foot radius around us and she taught us that, too.
So, on this day, her birthday, I want to remember her, her beauty, her kindness, that smile that lit up her face and then the room, her triumph over her own demons and the impact she, who never thought of herself before thinking of others, had on those who knew her.
I miss you, Mom and wherever you may be, if there is a heaven, I hope you hear my message of gratitude and love. If there isn't a heaven, there should be, just for you.
-
Solution
[email protected] on Mar 11, 2013
Tagged in: UntaggedWell, happy Monday! This week is about finishing and solving a problem. You see, for me, making parts is easy, assembling parts into, in this case, a necklace was not so difficult. This piece is large, how, in the world was I going to finish it? Translation: what kind of clasp could I make that would be consistent with the scale of the piece? And, I wanted it to be clean, no dangling cord, no sliding mechanism. Clean, it had to be not only the correct scale but have a certain look to it, yes, it's a clasp but I didn't really want it to look like a clasp.
Traditional clasps, metal, can be very successfully incorporated into polymer pieces but I prefer polymer solutions. Here's an example of the way I designed the closure for my Pods Necklace. I didn't mind the dangling cord and the way this closure works makes it possible to adjust the length of the piece. The dangle on the end hangs low or high.
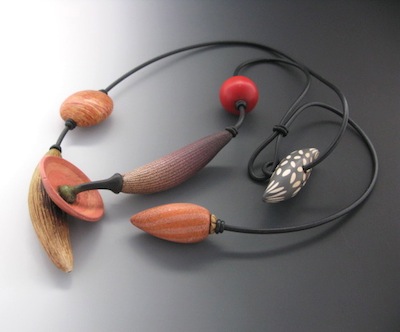
But this was not what I wanted.
I consulted my friends on facebook! Then, the lightbulb came on and this is what I designed for the Hemisphere Necklace. No dangling cord, it's the right scale for the piece.
Here's a detail shot.
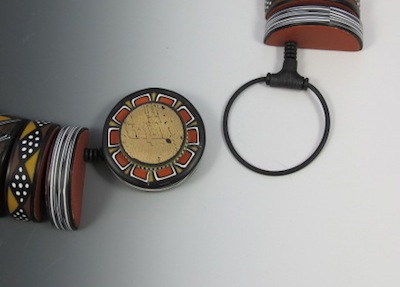
So, here is how to make this clasp.
First make and cure the decorative top. This clasp works best with round or oval pieces. Do not do a bean shape because you'll see the cord span across the ends. you'll see why.
Make a thick stack of clay, I think mine was 3 sheets rolled through the thickest setting of the pasta machine. Apply Polypaste to the bottom of the cure piece and press it to the slab.
Trim around the slab with your blade. Smooth the sides.
What you don't see is the channel into which the cord fits, this is what keeps the closure safely engaged. To make the channel, first roll into the sides of the thick slab with a needle tool. I position my needle tool not at exactly the halfway point in the slab but slightly above it toward the decorative clasp. The reason for this is a simple one. I have to have a hole into which I can glue cord, on the left side of the clasp in the picture. I cannot secure that end above the channel, it must be below. Now, enlarge the channel by rolling with a bamboo skewer or larger bore tool.
Pierce a hole into the clay below the channel, this is where you will glue the clasp.
The actual mechanism that fits into the channel is composed to three things - a clay "T", buna cord and o rings. The "T" forces the cord to round, which makes it easier to engage the closure. The o rings are insurance, they are glued to the cord and they are glued to the "T".
Making the "T" is easy, Just make a tube bead and cut a portion a bit larger than the finished size of the horizontal part of the "T", slide the rest of the tube off the skewer. Why? Because you will trim it later to make it neat and tidy.
Cut another portion of the tube bead and slide it off the skewer. Gently press this to the part still on the skewer. Blend them together and bake the "T" on the skewer.
After curing, slide it off. Sand it all over and cut the ends or the horizontal bar and the leg of the "T". If necessary, drill to enlarge the holes making certain that the cord will slide in.
Now. wrap a piece of cord in the channel and cut it about 1/4" short. Slide two o rings on this piece. Put the cord in the hole only to the half way point, slide an o ring so it will sit on the "T" when the cord in centered. Now, apply CA glue to both the cord and the o ring and insert into the "T". Repeat with the other end of the cord and the circle in the "T" is secure.
Glue the cord and o ring into the leg of the "T", measuring carefully what the distance is from the necklace to the end of the cord. You don't want it too long but you don't want it too short either.
TaDa! Next week, what I learned about seeing my work and how to see it better.
-
Shape Shifting
[email protected] on Mar 04, 2013
Tagged in: UntaggedI tend to make small canes, it's my preferred method, but my small canes still had more to give.
Having that short attention span, I could not make the same thing again so it seemed the logical next step was in changing the shape of the beads.
Hemispheres, I simply cut the discs in half. They are larger but, nonetheless, they are half discs. So, I got to work, for several days, I formed, applied slices, cured and sanded. Drilled holes and then I strung them up into what you see.
I was happy with this, the beads feel good on the skin, they drape nicely but...and this is a big but...what kind of clasp would work with this large piece...?
Conventional polymer clay clasps wouldn't work, at least the ones I have made, they tend to be smaller and they tend to feature something dangling from a cord. Metal clasps? No, they tend to be too small and I don't know enough about them to know if what I need, exists.
So, I thought and I thought. Next Monday, I will show you what I came up with and I will tell you how to make it.
-
In the Groove
[email protected] on Feb 25, 2013
Tagged in: Untagged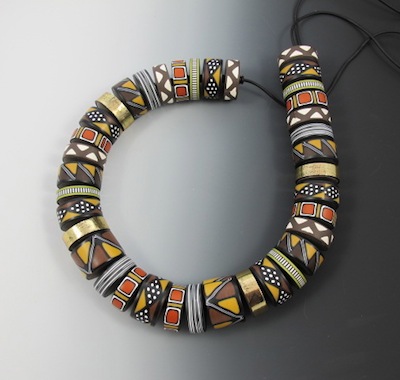
I've been hard at work on my clay again, I go in fits and spurts but when I'm in the groove, it takes a lot to get me out of the groove. Problem is, the groove is well worn and it's easy to fall into the usual way of working, the usual subject matter, the usual, it is a groove, after all.
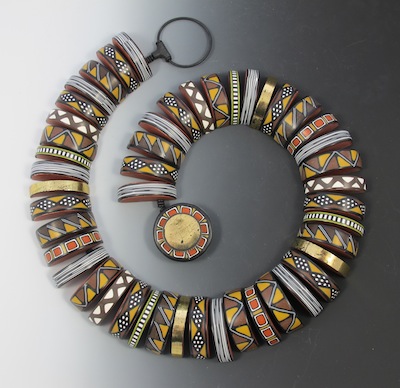
So, this time, I decided not to just fall in. No Skinner Blends (a staple part of the groove), no bright groovy colors, limited palette (not found in the groove) just to see where I would go. I did begin with a theme, though, mud cloth patterns. Love mud cloth. So it was limited color palette, flat colors, earth tones, patterns with blocks of color and lines and dots.
Canes, canes, canes. I spent a few days making them, I did refer to images on google this time, not just what I thought I remembered, but what it is. Somehow the canes mostly ended up in slender rectangles, well, it's easier to use them as components than it is to build a big mud cloth cane, just slice one of these, maybe one of these, put them together to make the larger, more complex pattern. I tried this but the results were not so exciting.
Shape sometimes dictates use. Reaching back into my memory banks, I remembered some disc bead necklaces that were made by my dear friend Natalia Garcia de Leaniz. These were great, they survived my poor memory!
And, here is what I made. Discs with mud cloth rims! Next installment - what happened then.
-
Freedom Train
[email protected] on Dec 06, 2012
Tagged in: Untagged
If I were an athlete, I'd play basketball. Or football, or soccer or polo. I'd not be a golfer or play singles tennis or bowl (which is, I suppose, a sport).
I like the feeling of being part of something, of being in the company of others moving along, progressing together toward some goal that benefits all involved. A rising tide elevates all those boats. The Titanic moved all those little boats aside - we know what happened to that big boat. It happens sometimes.
Maybe it's the Japanese part of me, the one being part of the whole, which is, I know not the normal "American" dream that drives us toward individual achievement and largely, individual benefit. Although, I have stepped out on my own at times. I've had to.
But, for me, it's being in the company of people I admire and respect that charges me on.
My friend Connie and I started a business a long time ago and we used to call it the "Freedom Train". Hop on and join us as we all move to a common destination. Yup, that's right up my alley.
I guess it depends on who we are, what moves us and what our ultimate motivation for doing anything might be - and that is different for everyone - it's not right, it's not wrong, it just is. Me, I'll stick with the Freedom Train, shoveling coal into the engine so we can all get there together.
-
Vive Le France!
[email protected] on Nov 09, 2012
Tagged in: Untagged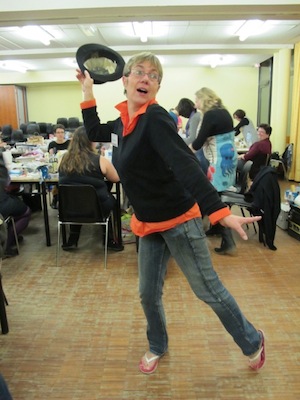
Sophie does the soft shoe...
Clay Carnival events have a very special place in my heart. The European events began with dear friend, Helen Cox in Nottingham, England. From there, we went to Madrid (Spain), Bad Homburg (Germany) and this year to France outside of Paris.
Teachers here were all CraftArtEdu instructors - 4 French (Sylvie, Isabelle, Stephanie and Sophie), 1 Spaniard (Natalia), 1 German (Bettina) and one from the good old USA (that would be me).
Over the years I have seen is the maturation of European polymer artists and their vision of this media. After years absorbing techniques that generated from America, they've contributed their unique spin on the medium and the results have taken polymer clay to a new place - exciting, full of color, texture and technically excellent.
I love these events - meeting up with friends from past classes, making new friends, gathering more poker chips in the swap (91 new chips!) and laughing a lot.
Thank you to Sylvie and Lezart'gil for organizing this fantastic event. Many thanks to the teachers who shared their knowledge and encouragement and very special thanks to students who came to spend their time in total clay immersion.
Muriel

Nathalie's wonderful brooch
Bettina
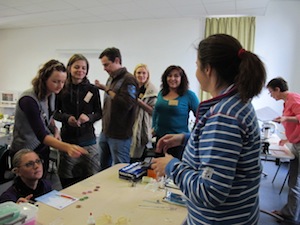
Natalia teaches
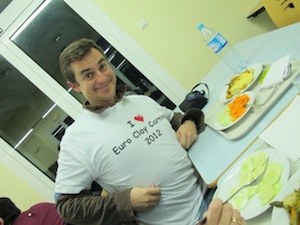
Dani loves the Euro Clay Carnival!
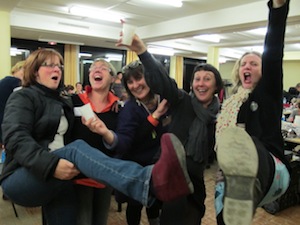
Making tons of fun
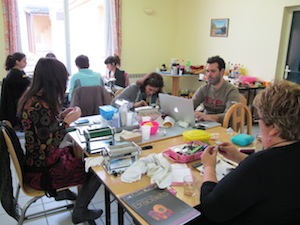
In class
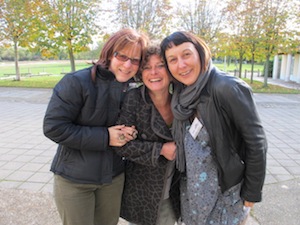
Sylvie, Manuela and Isabelle
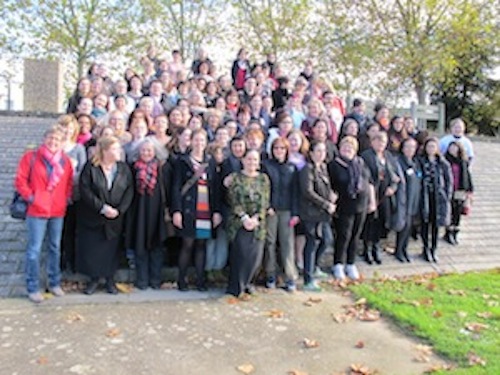
All of us! 91 students and 7 teachers!
-
Why we do what we do
[email protected] on Oct 31, 2012
Tagged in: UntaggedI didn't always know I'd love to teach. I never expected that so I didn't take education classes - it just never really occurred to me.
Teaching has been part of a very logical sequence of steps I've taken. First I started demonstrating. It's a great way to start teaching. You learn how to convey techniques, concepts in a very compressed time frame. Very few people at show will stay with you from days start to days end. Even if they wanted to, they can't.
Demonstrating and teaching are like stories, there is a beginning, a middle and an end. You tell your story and at the end, your students derive all the benefit of a good book, with something they've made to boot.
Teaching in person is great, being with students is an incredibly rewarding experience but limited as to how many people a teacher can physically be with. And, that's why I decided to dive into the world of internet instruction. I can reach many students and I can even reach them across the globe. I love polymer clay, I want everyone to love it as much as I do. More than that, I want them to get better at doing it.
Working on our platform has been exhilarating. Making my first class, learning what I could do with it, was like seeing the New World for the first time. Okay, I overstate, but it was exciting. The notion that I could upload the perfect images (that is, the image perfect for my students to see), and I could even upload video was a blast. And, it is easy and intuitive, too.
Being able to speak to my students made it possible for me to make sure they hear exactly what I think is important. You know, print articles and books are hard, there are space limitations but here, I have no such limitations.
Being able to write my thoughts out, read what I'd written and edit to clarify, makes me a better teacher. It makes me more clear and in 3 years, I haven't had one question about a process or technique. I think that's because I can plan and edit and even re-edit if I think of a better way to tell my students how to do something. I added some content to my new class and the students who registered for it before, will get that new content automatically.
I have control, all our teachers have control, over what they upload, what they say and they do it on their time and from the comfort of their own homes. Because of the way we work, we can post our newest classes faster for you, too.
I began my journey just loving clay. Now, I also love teaching about clay. More than that, I want my students to make a jump up after seeing a class. Beginner moving to Intermediate, Intermediate moving to Advanced. I can do this in classes that I design for that purpose and then create them on our platform.
When I started, I just wanted to make art. I still do but I really want my students to make art and that's why I teach at CraftArtEdu.
-
Total Immersion
[email protected] on Oct 20, 2012
Tagged in: UntaggedHere I am in Las Vegas at the 10th, well, to the best of our knowledge, it's the 10th Clay Carnival!
8 teachers, four days of polymer clay immersion. This year we have Veronique and Lynda from France, Elena from Argentina, Arlene from Canada, Eti from Israel and American enthusiasts who have come from Hawaii (Sarah), and lucky Earnestine from Florida.
CraftArtEdu teachers Judy Belcher, Kim Cavender, Leslie Blackford, Natalia Garcia de Leaniz, Sarah Shriver, and me!
Ours is a wonderful, warm and giving community - it's a treat to greet old friends and meet so many new ones.
Tonight was our "signature" Pizza Party night - the only place in Vegas where you're a guaranteed winner. Of course, you might not really want the goofy presents you win, but hey, you win.
Two more days of clay! More good times and the happy rolling of pasta machines! I will report more and post pictures, too.